

Benefits of Using a Laser Level for Renovations
Table of Contents
- Why a Laser Level Belongs in Your Renovation Toolkit
- How Laser Levels Work and the Types That Fit Renovations
- How to Use a Laser Level for Home Renovation
- Laser Level Accuracy and Calibration: Keeping Your Lines True
- Choosing the Best Laser Level for DIY Projects
- Using a Laser Level for Tile Installation
- Common Mistakes to Avoid and Budget vs. Professional Models
- Conclusion
- Frequently Asked Questions
Last Updated: October 20, 2026
Why a Laser Level Belongs in Your Renovation Toolkit
The benefits of using a laser level for renovations come down to one thing: a reference line that never drifts. Unlike a bubble vial that depends on your eye and a steady hand, a laser projects a consistent horizontal or vertical plane across an entire room, so every cabinet, outlet, and tile row lines up from the first measurement to the last. A laser removes that guesswork.

The payoff is fewer do-overs. When cabinets, tile, and trim all reference the same beam, you cut once and install once. That saves material, and it saves the weekend you would have spent pulling crooked trim off the wall.
How Laser Levels Work and the Types That Fit Renovations
A laser level is a tool that projects a straight beam of light, usually red or green, onto walls and floors to establish a level horizontal line, a plumb vertical line, or both. A diode inside the unit fires the beam through a lens, and a self-leveling mechanism uses a pendulum to settle the beam true within a few seconds of setup. The OSHA guidance on hand and power tools is a useful reminder that setup and mounting still matter, since a laser on a wobbling surface is only as good as its base.

Rotary, Cross-Line, and Dot Lasers Compared
| Type | What It Projects | Best For | Typical Setup |
|---|---|---|---|
| Cross-line | One horizontal and one vertical line | Hanging cabinets, tiling walls, framing | Magnetic base or tripod |
| Rotary | A 360-degree spinning beam | Large rooms, ceiling grids, site layout | Tripod mount |
| Dot | Individual plumb dots | Aligning recessed lights, framing corners | Wall mount or clamp |
Cross-line models cover most renovation work. Rotary units earn their keep on big open floors. Dot lasers are a niche pick for ceiling work and vertical alignment where you only need a single reference point.
How to Use a Laser Level for Home Renovation
Learning how to use a laser level for home renovation takes about ten minutes, but the sequence matters more than the speed. The steps below work for nearly every indoor project, and the task-specific notes that follow show where the beam earns its keep.
The Core Setup Sequence
- Charge or load fresh batteries before you start. A beam that dims mid-layout is worse than no beam at all.
- Set the unit on a tripod or magnetic base at a workable height. For floor work, mount low; for wall cabinets, mount near the top of the run so the beam clears obstructions.
- Let the self-leveling pendulum settle until the out-of-level indicator stops flashing. This is the step most people rush.
- Mark your reference point on the wall with a pencil, then rotate or reposition the beam to your second reference.
- Lock the pendulum before you move the tool to the next room. An unlocked pendulum swings during transport and can knock the unit out of tolerance.
The most common mistake is rushing step three. If the out-of-level indicator is still blinking, the beam is not true yet, and every mark you make inherits that error. A second common error is mounting on a hollow-core door or a loose shelf bracket; the beam is only as stable as its base.
Task-Specific Setup Notes
Hanging kitchen cabinets. Set a horizontal beam at the height of the cabinet bottom line, then use a vertical beam to mark the centerline of each cabinet run.
Tiling a bathroom wall. Set a horizontal beam at the top of the first full row and a vertical beam at the centerline of the wall. Work outward from the centerline so cut tiles land at the corners, where they are less visible.
Hanging crown molding. Project a horizontal beam at the height of the molding's bottom edge and a vertical beam at each inside and outside corner.
Framing a wall. Use a vertical beam to plumb the studs and a horizontal beam to mark the plate line. A cross-line unit on a tripod is enough for a single wall; a rotary unit is faster when you are laying out an entire room.
Laser Level Accuracy and Calibration: Keeping Your Lines True
Laser level accuracy and calibration decide whether the tool stays trustworthy over years of use. Most units are rated to a tolerance over a set distance, and that tolerance is only valid when the tool is calibrated. A simple field check: project a line across a room, mark the beam at both ends, then turn the unit 180 degrees and see whether the beam lands on the same marks. If it drifts, recalibrate per the manual or send it in.

Store the tool with the pendulum locked. Dropping an unlocked laser is the fastest way to knock it out of tolerance. Keep the lens clean with a soft cloth, and check the FTC guidance on product warranties before assuming a repair is covered, since warranty terms vary by brand.
Choosing the Best Laser Level for DIY Projects
The best laser level for DIY projects is a self-leveling cross-line model with a magnetic base and a visible green beam. Green reads more clearly in bright rooms than red, and a magnetic mount lets you hang the unit on a steel stud or a bracket without a tripod.
For a dependable mid-range pick, the DEWALT DW088CG Self-Leveling Cross-Line Laser Level at $209.99 covers cabinet, tile, and framing work with a self-leveling mechanism and a protective case. If you want a low-cost starter, the Ryobi ELL1750 Multi-Surface Laser Level at $32.00 adds magnetic mounting and bubble vials for quick jobs, while the Ryobi Compact Laser Level 15 Ft ELL1501 at $23.00 suits tight spaces and short spans.
DEWALT DW088CG Self-Leveling Cross-Line Laser Level Black/Yellow with Case T-225 →
What most guides miss: beam visibility matters more than raw range indoors. A beam you can see across a sunlit room beats a longer beam you have to squint at.
Using a Laser Level for Tile Installation
A laser level for tile installation replaces the chalk line and the guesswork. Set a horizontal beam at the height of your first full row, then work off that line so every row stays true across the floor or wall. For wall tile, a vertical beam keeps columns aligned and corners square.
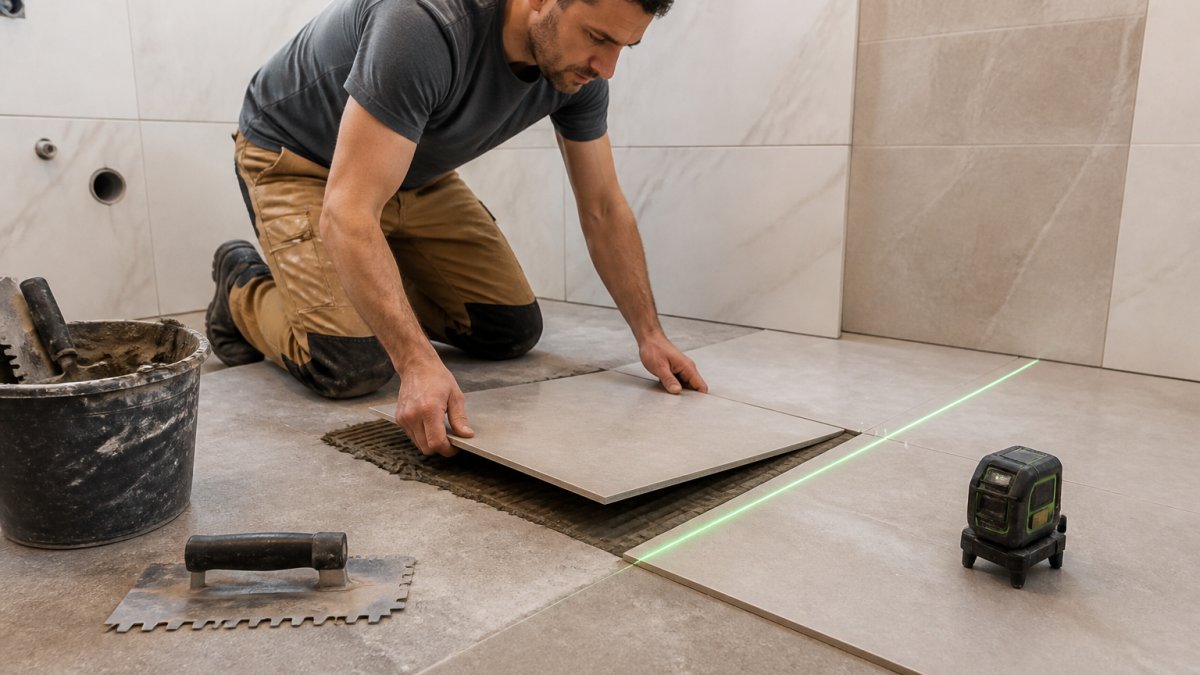
Check the layout against the beam before you spread thinset. Once the mortar is down, moving a row means scraping it off. The Tile Council of North America installation guidelines are worth a read for substrate prep, since a laser cannot fix an uneven floor.
Common Mistakes to Avoid and Budget vs. Professional Models
The biggest mistake is buying more laser than the job needs, but the second biggest is buying less than the job needs and discovering it mid-project. The decision comes down to three variables: the span you need to cover, the accuracy tolerance the work demands, and the environment the tool will live in.
Budget vs. Professional: A Decision Framework
A budget cross-line unit handles most home renovations. It is sufficient when:
- Your longest layout span is under about 30 feet, which covers most bathrooms, kitchens, and single-room framing jobs.
- Your tolerance is a quarter inch over the span, which is typical for tile, trim, and cabinet work.
- You work indoors or in shaded conditions where a red or green beam reads clearly.
A professional-grade rotary or high-accuracy cross-line unit earns its price when:
- You are laying out a large open floor, a ceiling grid, or a multi-room framing job where a 360-degree beam saves repeated repositioning.
- Your tolerance is tighter than a quarter inch over the span, which comes up in cabinet runs, curtain-wall framing, and some tile patterns.
- You work outdoors in bright sun, where you need a detector or a green beam with higher output.
- The tool will be dropped, transported daily, or used in dusty or damp spaces, where a higher IP rating and a protective case pay for themselves.
A common pattern is a DIYer buying a budget unit for a single bathroom remodel, then buying a second budget unit after the first drifts out of tolerance. One mid-range cross-line unit with a case often costs less than two budget replacements and holds its accuracy longer.
Calibration and Maintenance: The Step Most Guides Skip
Most guides ignore what happens after a drop, which is the moment a laser level stops being trustworthy. A simple field check: project a line across a room, mark the beam at both ends, then turn the unit 180 degrees and see whether the beam lands on the same marks. If it drifts, recalibrate per the manual or send it in. Do this check after any drop, after any long transport, and at the start of any project where a layout error would be expensive to fix.
Store the tool with the pendulum locked. Keep the lens clean with a soft cloth. Check the FTC guidance on product warranties before assuming a repair is covered, since warranty terms vary by brand and often exclude drops.
Other Traps to Dodge
- Skipping calibration checks after any drop
- Working off a beam that is still self-leveling
- Ignoring the IP rating in dusty or damp spaces
- Forgetting to lock the pendulum before transport
- Mounting on a hollow-core door or a loose shelf bracket
- Assuming a green beam is always brighter; in very bright sun, a detector matters more than beam color
Conclusion
Getting a renovation to look professional comes down to consistent reference lines, and a laser level delivers them faster than any manual method. Tools, Handbags, and More stocks cross-line and compact laser levels for every budget, and if a specific model is not on the shelf, our custom sourcing service will track it down for you. Browse our tool selection and start your next project with a line you can trust.
Frequently Asked Questions
Is a laser level more accurate than a bubble level?
For long runs, yes. A bubble level is only as accurate as your eye can read the vial, and small errors multiply over distance. A self-leveling laser projects a continuous reference line across an entire wall or floor, so a 20-foot cabinet run stays on one plane instead of drifting. Bubble levels still win for short, tight spots and quick checks. Many renovators keep both: the laser for layout, the bubble level for confirming individual pieces.
Can one person use a laser level for DIY renovations?
That is one of the biggest benefits of using a laser level for renovations. A two-person job like marking a level line around a room becomes a solo task: set the unit on a tripod or magnetic mount, turn it on, and trace the beam. Look for a self-leveling model with a pendulum lock and an out-of-level indicator so you know the beam is true before you start marking.
Are laser levels worth buying for occasional home projects?
If you have tiling, cabinet hanging, or shelving on your list, a basic model pays for itself quickly. The Ryobi Compact Laser Level 15 Ft ELL1501 costs $23.00 and handles short-range layout, while the Ryobi ELL1750 Multi-Surface Laser Level at $32.00 adds magnetic mounting and bubble vials for flexibility. For whole-room work, the DEWALT DW088CG Self-Leveling Cross-Line Laser Level at $209.99 gives you a self-leveling cross-line setup built for repeated use.
What type of laser level is best for indoor renovations?
A cross-line laser is the practical pick for most indoor work. It projects one horizontal and one vertical line at 90 degrees, which covers leveling cabinets, framing, and tile layout in a single setup. Rotary lasers suit large open areas and outdoor grading, while dot lasers are best for point-to-point alignment like recessed lighting. Green beams are easier to see in bright rooms, and a self-leveling pendulum saves setup time on every project.