

Cleaning Tips for Specialty Tumbler Finishes
Table of Contents
- Why Specialty Tumbler Finishes Need Different Care
- Best Cleaning Supplies for Insulated Cups
- Daily Cleaning Routine for Specialty Tumbler Finishes
- How to Clean Powder Coated Tumblers Without Damage
- Dishwasher Safety for Specialty Tumblers
- Deep Cleaning and Odor Removal for Insulated Tumblers
- Troubleshooting Finish Damage and What to Avoid
- Frequently Asked Questions
Last Updated: September 12, 2026
Why Specialty Tumbler Finishes Need Different Care
Specialty tumbler finishes are decorative or protective surface treatments, powder coating, epoxy wraps, plated metal, that sit on top of the stainless steel body and need gentler cleaning than bare metal. That outer layer makes a tumbler distinctive, and it is the first thing harsh cleaning ruins.
A tumbler's insulation lives in the stainless steel wall, but its appearance lives in the finish. Abrasive sponges, bleach, and high-heat dishwasher cycles attack the coating, not the steel, and once a powder coat chips or an epoxy wrap lifts, no cleaning routine brings it back.

Below, we'll show you how to clean each finish type safely, what supplies work, and which habits to drop.
Stanley's official care and use guidance
Powder-Coated vs. Stainless Steel vs. Decorative Epoxy
Each finish responds differently to water, heat, and friction, so the method must match the surface.
- Powder-coated tumblers: A baked-on polymer layer that is durable but can chip at the rim and base. Mild dish detergent and a soft cloth are enough.
- Bare stainless steel: The most forgiving surface. It resists most cleaners but shows water spots and fingerprints, and it scratches with abrasive pads.
- Decorative epoxy or wrap finishes: Printed or glitter layers sealed under resin or vinyl. These are the most delicate and should never soak for long periods or go through a heated dry cycle.
The takeaway: match your cleaner to the finish, not to the brand of cup.
Best Cleaning Supplies for Insulated Cups
The right kit costs little and covers every finish type. Skip specialty sprays and build around mild, non-abrasive basics.
- Mild dish detergent
- Baking soda
- Distilled white vinegar
- A soft bottle brush with flexible bristles
- A non-abrasive cloth or microfiber towel
- A straw brush for lid components
- Warm water
Baking soda handles stain removal and deodorizing; distilled white vinegar cuts mineral deposits and hard-water film. Neither harms a powder-coated or epoxy surface when rinsed thoroughly.
Daily Cleaning Routine for Specialty Tumbler Finishes
A 60-second rinse after each use prevents nearly every problem deep cleaning later has to fix. For a specialty finish, the difference is not the steps but the chemistry and contact time: bare stainless steel tolerates almost anything, while a powder coat, epoxy wrap, or plated surface does not.
- Empty the tumbler completely, including ice or leftover liquid. Sugary residue and dairy left at room temperature feed gasket odor.
- Add a drop of mild dish detergent and fill halfway with warm, not hot, water. Water above roughly 140°F softens the powder coat's bond at the rim and base and can cloud a plated finish (nsf.org).
- Swirl for 15-20 seconds, then scrub the interior with a soft bottle brush. Keep the brush moving; do not let bristles sit against one spot on a coated exterior.
- Rinse thoroughly under warm running water. Rinsing matters more on coated surfaces because dried detergent film reads as a dull patch on a matte or glitter finish.
- Wipe the exterior with a damp non-abrasive cloth. Microfiber is safest because the fibers lift residue instead of dragging it across the coating.
- Air dry upside down with the lid removed. Trapped moisture under a closed lid encourages gasket odor and mildew and leaves water spots on the finish.
That last step is the one most owners skip. A tumbler dried upright collects standing water at the base, exactly where a powder coat is thinnest and most prone to lifting.
If you drink coffee or tea daily, add a weekly baking soda rinse to stop residue bonding to the interior wall. On the exterior, wipe with plain warm water only; citrus-scented and "degreasing" soaps contain solvents that slowly dull a decorative wrap.
Why Contact Time Matters More Than Scrubbing
Most finish damage from daily cleaning is not caused by the tool but by how long the cleaner sits on the surface. A mild detergent left on a powder coat for two minutes is harmless; left to dry overnight, it can leave a faint etch mark no rinsing removes.
The practical rule: apply, agitate, rinse, dry. Never let a cleaner sit on a specialty finish and air-dry. This habit separates tumblers that look new after a year from ones with cloudy patches and faded graphics.
How to Clean Powder Coated Tumblers Without Damage
Cleaning a powder-coated tumbler safely comes down to three rules: mild soap, soft tools, and no soaking. Follow them and the finish outlasts the cup's warranty; break them and you will see damage within weeks, not years.
Start with warm water and a few drops of mild dish detergent, then wipe the exterior with a non-abrasive cloth using light pressure. For textured or matte powder coats, a soft bottle brush reaches into the surface grain without scratching. A powder coat is a cured polymer film, durable against impact but vulnerable to abrasion and prolonged chemical exposure.
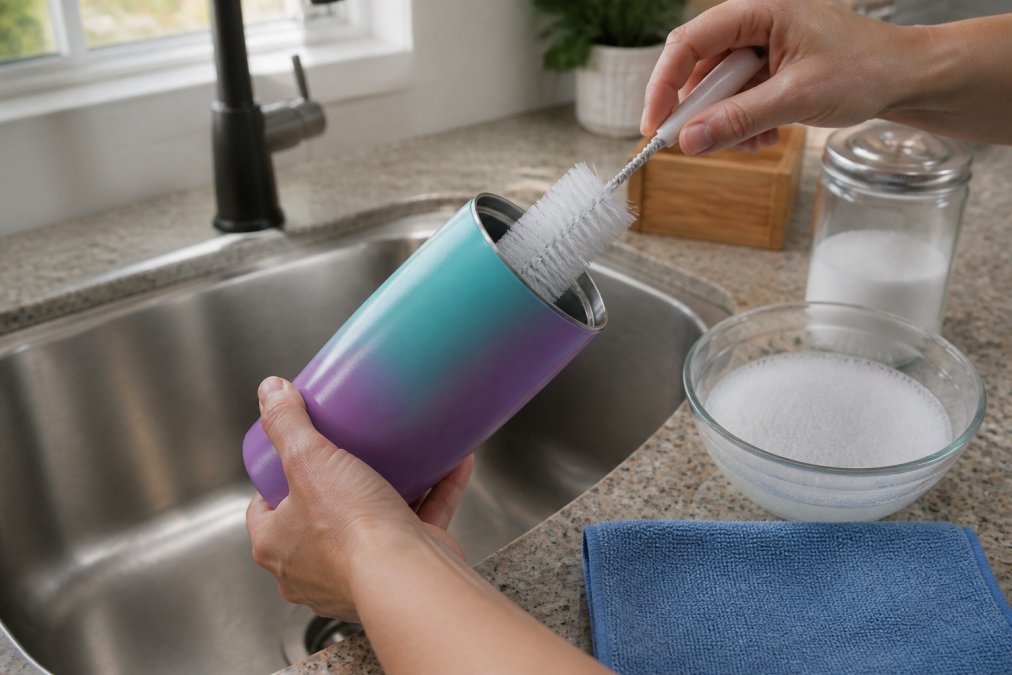
Never use an abrasive sponge, steel wool, or scouring powder, they strip the coating in a single session, and the dull patch cannot be polished out. The same applies to melamine sponges, which feel soft but act as a fine abrasive and slowly wear a matte finish to a shine where you scrub most.
A common mistake is soaking a powder-coated tumbler overnight to loosen stains. Long soaks seep under the coating at the rim and base, where the bond is thinnest, and cause it to lift from the inside out. The first sign is usually a hairline bubble or a raised edge that catches on a fingernail.
Cleaning Agents: What Is Safe and What Strips the Finish
The cleaner you choose matters more on a powder coat than on bare steel, because the coating is a polymer some solvents can soften. Here is how common household cleaners behave on a specialty finish:
- Mild dish detergent (pH-neutral): Safe for daily use on powder coat, epoxy, and plated finishes.
- Baking soda paste: Safe for spot stain removal. Rinse fully; dried residue looks like a stain.
- Distilled white vinegar (diluted): Safe for hard-water film and mineral spots. Do not leave it on a plated finish for more than a minute or two.
- Rubbing alcohol (isopropyl): Acceptable for occasional spot cleaning of fingerprints or adhesive residue. Use sparingly and rinse.
- Citrus-based degreasers: Avoid. The d-limonene in these products is a solvent that softens many decorative coatings over repeated use.
- Bleach and chlorine cleaners: Avoid. They dull the surface and can discolor a glitter or metallic finish permanently.
- Ammonia-based glass cleaners: Avoid on coated exteriors. They are formulated for glass, not polymer films.
- Acetone, nail polish remover, and paint thinner: Never. These dissolve the coating on contact.
Is It Cleaning Damage or a Manufacturing Defect?
Not every flaw on a powder-coated tumbler comes from cleaning. Knowing the difference tells you whether to change your routine or contact the seller.
- Uniform dullness across the whole exterior: Almost always cleaning damage, abrasive tools or a harsh cleaner used repeatedly. A manufacturing defect would not affect the entire surface evenly.
- Cloudy or chalky patches in high-touch areas: Cleaning damage. These appear where your hand grips or where the tumbler rests, matching your routine, not the factory.
- Chipping at the rim or base with sharp edges: Usually physical damage from drops, dishwasher racks, or stacking. Powder coat chips at impact points, not from soap.
- Peeling that starts at a seam or graphic edge and spreads: Often heat damage from a dishwasher or hot liquid, but if it appears on a new tumbler that has never seen heat, it can indicate a bonding defect at the factory.
- Bubbling under the coating with no external cause: More consistent with a manufacturing defect in the coating application than with cleaning. Document it with photos before contacting the seller.
A useful test: if the damage follows your cleaning pattern, the spots you scrub, the side that faces the dishwasher spray, it is your routine. If it matches the coating's seams, graphics, or application lines, it is more likely the finish itself.
Protecting the Finish Between Cleanings
The cheapest way to preserve a powder coat is to reduce how often it needs deep cleaning. Rinse daily, dry fully, and store upright with the lid off so air circulates. Do not stack coated tumblers directly against each other, the contact points rub, and over months that friction wears through the coating at the base and shoulder.
If you carry a tumbler in a bag, a cloth sleeve or dedicated cup pocket prevents the abrasion that shows up as scuffed graphics and worn edges. It is the difference between a finish that looks new after two years and one that looks tired after six months.
Dishwasher Safety for Specialty Tumblers
Most insulated tumblers are labeled dishwasher safe, but that label usually refers to the stainless steel body, not the decorative finish. Heat and harsh detergent damage specialty surfaces.
| Component | Dishwasher Safe? | Recommended Method |
|---|---|---|
| Stainless steel body | Usually yes, top rack | Hand wash to protect finish |
| Powder-coated exterior | No | Hand wash with mild soap |
| Epoxy or wrap finish | No | Hand wash, no soaking |
| Lid and gasket | Top rack only | Hand wash and air dry |
| Reusable straw | Usually yes | Straw brush and warm water |
The heated dry cycle is the real culprit: sustained high heat weakens the bond between coating and steel, showing up later as peeling edges and cloudy patches (energy.gov). If you do run a tumbler through the dishwasher, use the top rack, skip heated dry, and never wash a decorative finish that way.
Deep Cleaning and Odor Removal for Insulated Tumblers
Odor in an insulated tumbler almost always comes from the lid assembly, not the body. The stainless steel interior does not absorb smells; the gasket and straw do.
For a full deep clean, fill the tumbler with warm water, add a few tablespoons of baking soda and a splash of distilled white vinegar, and let it sit 10-15 minutes. Scrub with a bottle brush, rinse thoroughly, repeat if odor persists, and leave open to air dry completely.
For mineral deposits from hard water, soak the interior in distilled white vinegar for 15 minutes, then rinse and wash as usual.
Cleaning the Lid, Gasket, and Straw
The gasket is a removable silicone seal inside the lid, and it is where residue buildup hides. Pull it out every time you wash the lid.
- Disassemble the lid completely, removing the gasket and sliding cover.
- Wash each piece in warm water with mild dish detergent.
- Run a straw brush through the straw and the lid's drinking spout.
- Rinse every part thoroughly.
- Air dry all components separately before reassembling.
Reassemble only once everything is completely dry. A damp gasket on a damp lid is an odor problem waiting to happen.
Troubleshooting Finish Damage and What to Avoid
Some finish damage is reversible; most is not. Knowing the difference saves you from making a small problem worse.
- Cloudy or dull patches: Usually hard-water film or detergent residue. A distilled white vinegar wipe often restores the shine.
- Fine scratches: Caused by abrasive sponges. Light scratches on stainless steel may buff out; on powder coat they will not.
- Chipping at the rim or base: Physical damage to the coating. Touch-up is rarely successful, so prevention is the only real fix.
- Peeling epoxy or wrap edges: Heat damage from dishwashers or hot liquids. Once an edge lifts, it continues to spread.
Avoid bleach, scouring powders, steel wool, and citrus-based degreasers on any coated surface. Bare stainless steel gives you more room to work, but there is still no reason to use an abrasive when mild dish detergent does the job.
When you're ready to add a tumbler worth protecting, Tools, Handbags, and More carries new-in-box options like the Stanley 40 oz Quencher H2.0 in the Dior-style pattern, and our custom sourcing service will track down specific colors and limited editions that aren't currently in stock.
Specialty tumbler finishes reward patience and punish shortcuts. The routine is simple: mild dish detergent, soft tools, warm water, and a proper air dry. If you're hunting for a specific finish, color, or limited-edition tumbler, Tools, Handbags, and More can source it for you, with new-in-box Stanley Quenchers, personalized assistance, and a broad catalog of household and accessory products. Get started with Tools, Handbags, and More and keep every finish looking new.

Frequently Asked Questions
How do I remove stubborn stains from a powder-coated tumbler?
Mix baking soda with warm water to form a paste, apply it to the stain with a non-abrasive cloth, and let it sit for 10-15 minutes. Gently scrub in circles, then rinse thoroughly. For coffee or tea stains, a diluted distilled white vinegar soak works well. Avoid abrasive sponges, which can scratch the powder coating and dull the finish. Always test on a small area first.
Is it safe to put specialty finish tumblers in the dishwasher?
Most manufacturers recommend hand washing for specialty finishes. Dishwasher heat and harsh detergents can break down protective coatings, fade powder-coated colors, and damage silicone seals over time. If you must use a dishwasher, place the tumbler on the top rack and skip heated drying. Hand washing with mild dish detergent and warm water is the safest way to preserve the finish.
What cleaning supplies work best for insulated cups with delicate finishes?
Use a bottle brush, a non-abrasive cloth or sponge, mild dish detergent, baking soda, and distilled white vinegar. These tools clean effectively without scratching powder-coated or epoxy surfaces. Avoid steel wool, abrasive sponges, and bleach-based cleaners. A dedicated straw brush helps clean lid components and silicone gaskets where residue buildup and odors collect.
How do I deep clean my tumbler and remove odors?
Disassemble the lid, gasket, and straw. Soak all parts in warm water with mild dish detergent for 15-20 minutes. For odors, soak in a solution of 1 part distilled white vinegar to 3 parts water, then rinse thoroughly. Scrub the interior with a bottle brush and air dry completely before reassembling. This routine prevents residue buildup and keeps your tumbler fresh.