

How to Organize a Small Toolbox Efficiently
Table of Contents
- What You'll Need Before You Start Organizing
- Step 1: Empty Everything and Sort Your Tools by Category
- Step 2: Choose the Best Tool Box Organizers for Small Spaces
- Step 3: Arrange Your Essential Tools for a Home Toolbox by Frequency of Use
- Step 4: Use DIY Toolbox Organization Hacks to Maximize Drawer Space
- How to Keep Tools From Sliding in a Small Toolbox
- Maintaining Your Organized Toolbox: Rust Prevention and Weight Distribution
- Conclusion
- Frequently Asked Questions
Last Updated: October 3, 2026
What You'll Need Before You Start Organizing
You don't need to buy anything to learn how to organize a small toolbox efficiently. Most guides get this wrong, sending you shopping before you've looked at what you own.
Here's what you actually need on hand:
- A flat surface, like a table or garage bench
- A trash bag for broken or duplicate items
- A damp cloth for wiping down tools
- Small containers or bowls for sorting
- A notepad or phone for tracking what you have
That's it. Everything else comes later, once you know what you're working with. The goal: see every tool, then decide what stays. A small toolbox only fails when it holds too much.
Step 1: Empty Everything and Sort Your Tools by Category
Dump every tool onto your work surface, all of it, including the loose screws at the bottom. Group items by what they do, not by size; sorting by shape scatters related tools across the box.
Use these buckets:
- Cutting tools: knives, snips, blades
- Fastening tools: screwdrivers, hex keys, nut drivers
- Gripping tools: pliers, wrenches, clamps
- Measuring tools: tape measures, levels, squares
- Power tools and bits: drills, drivers, batteries
Grouping Tools by Trade: Electrical, Plumbing, and Automotive
If you work across trades, group by job instead. Electrical tools live together: wire strippers, voltage tester, electrical tape. Plumbing tools stay separate: pipe wrench, Teflon tape, tubing cutter. Automotive tools get their own zone: socket sets, torque wrench, oil filter wrench. This saves time on the job, you grab one section, not the whole box.
Decluttering and Removing Duplicate Tools
Duplicates are the silent space killers. If you have six Phillips heads and use two, the other four are stealing room.
Pull out anything that is:
- Broken or stripped
- Rusted beyond saving
- A duplicate you never reach for
- A tool you haven't touched in a year
Set these aside, donated or moved to a junk drawer. Either way, they leave the box.
Step 2: Choose the Best Tool Box Organizers for Small Spaces
The best tool box organizers for small spaces are modular ones you can rearrange as your tools change. Fixed dividers lock you into one layout; modular pieces adapt.
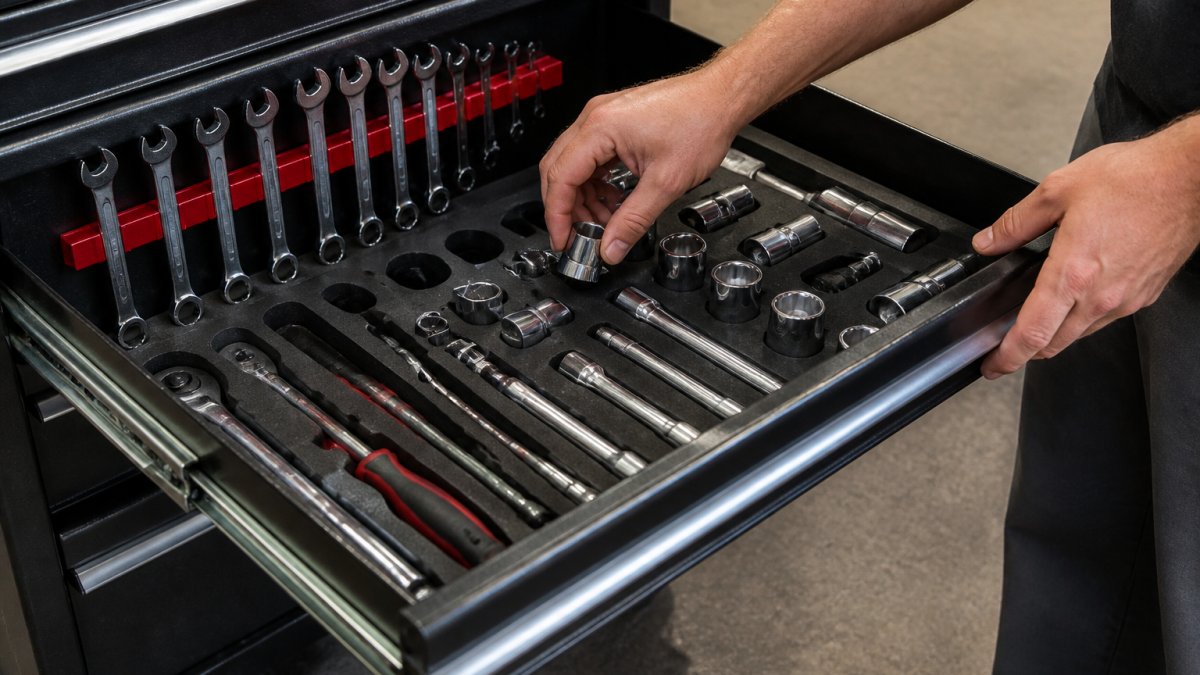
Start by measuring the interior. Most compact boxes fall in one of three interior footprints:
- Small hand box: roughly 12 x 6 x 5 inches, one tray, no drawers
- Mid-size box: roughly 16 x 8 x 8 inches, one to two removable trays
- Compact chest: roughly 20 x 10 x 12 inches, two to three shallow drawers
Write those numbers down before you buy. Every organizer is sold by outer dimension, and one a half-inch too wide wastes the whole row.
The Four Organizer Types and What Each One Costs You
| Organizer | Best for | Trade-off |
|---|---|---|
| Adjustable drawer dividers | Mixed hand tools, changing loadouts | Wastes 1/8 to 1/4 inch per wall |
| Small bins and cups | Screws, bits, loose hardware | Contents invisible from above |
| Wrench racks and socket rails | Sized sets you grab as a unit | Fixed spacing, no odd sizes |
| Foam inserts (shadow boarding) | Fixed home box, theft/omission check | One layout only, expensive to redo |
Match the organizer to the tool. A socket rail beats a bin: you see every size at a glance and a missing 10mm is obvious, while a bin of loose sockets hides the gap until you need it.
Foam Inserts, Magnetic Strips, and Drawer Liners
Foam inserts give a custom fit: you cut each tool's shape into the foam so nothing shifts.
Magnetic strips hold metal tools flat against a wall or lid, freeing floor space.
Drawer liners stop sliding. A simple rubber liner keeps everything in place when you carry the box.
For cords specifically, a dedicated holder keeps them from tangling. We carry the Yellow Jacket Extension Cord Holder, 2-Pack for $19.87.

A Budget-First Buying Order
Most people overspend on organizers before knowing what they need. Buy in this order and stop when the box stops shifting:
- Rubber drawer liner, under $10, fixes 80% of sliding
- Adjustable dividers, one set, sized to your interior width
- One socket rail or wrench rack, only for the set you use most
- Small bins, only for hardware you actually sort
- Foam or magnetic strips, last, and only if the box is a fixed home box
Step 3: Arrange Your Essential Tools for a Home Toolbox by Frequency of Use
The essential tools for a home toolbox should sit where your hand lands first. Frequency of use decides placement, not size or category.
Put your top five tools in the front and center. For most homes, that's:
- Tape measure
- Phillips screwdriver
- Flathead screwdriver
- Adjustable wrench
- Utility knife
Everything else fills the space behind them. Most people skip this, arranging by category and then digging past rarely used items to reach daily tools. Accessibility beats neatness.
Ergonomic Layout for Quick-Access Tools
Ergonomics in a toolbox means less reaching and less twisting: heavy tools go low and close to your body, light tools go high.
- Heavy items: hammers, drills, large wrenches at the bottom
- Medium items: pliers, screwdrivers at mid-level
- Light items: bits, tape, small parts up top
If you carry the box often, this layout also improves weight distribution.
Step 4: Use DIY Toolbox Organization Hacks to Maximize Drawer Space
You can maximize drawer space without spending much. DIY toolbox organization hacks often beat store-bought trays because you build them to fit.
Yellow Jacket Extension Cord Holder, 2-Pack Plastic Portable Organizer, T-259 →
Try these:
- Cut a cereal box into a grid for bit storage
- Use a magnetic strip from a hardware store on the lid
- Repurpose a pill organizer for tiny screws
- Zip-tie small bins to a rail inside the box
- Use a spice rack as a tiered tool shelf
Each hack solves one problem: wasted vertical space. Most small boxes have unused height. Stack or hang tools to use it.
Vertical Storage and Shadow Boarding on a Budget
Vertical storage means standing tools up instead of laying them flat. Pliers and screwdrivers take far less room on edge.
Shadow boarding usually means foam cutouts, but you can do it cheaply. Trace each tool onto cardboard, cut the shape, and lay it in the drawer. The tool drops into its own slot, and you can see at a glance if one is missing.
How to Keep Tools From Sliding in a Small Toolbox
Tools slide when the box has no grip and no dividers. Fix both, and the problem disappears.
Use these methods:
- Line the bottom with rubber drawer liner
- Add magnetic strips for metal tools
- Use compartmentalization with small bins
- Pack gaps with foam blocks
- Keep the box full enough that tools can't shift
A full box slides less than a half-empty one. Decluttering helps twice: you gain space, and what stays sits tighter.
Maintaining Your Organized Toolbox: Rust Prevention and Weight Distribution
Rust destroys tools faster than use does. Moisture is the enemy, and a closed box traps it, most organization guides skip this entirely, treating the box as a finished product instead of a system needing upkeep.
Rust Prevention: What Actually Works
Steel rusts when relative humidity stays above roughly 60% and the surface has no barrier. In a garage or shed, that happens seasonally. Three defenses, in order of cost:
- Wipe and dry. Every tool goes back dry. A damp cloth left in the box is worse than no cloth.
- Silica gel packets. One 10-gram packet per roughly 1 cubic foot of box interior. Replace or recharge (bake at 250°F for 2 to 3 hours) every 2 to 3 months, or when the indicator beads change color.
- Light oil film. A thin coat of machine oil or a dedicated tool wipe on wrenches, sockets, and anything with a bare steel face. Not on handles, not on electronics.
Rust shows up first on the tools you touch least, the bottom-of-the-box wrenches and spare sockets. That's why decluttering matters twice: fewer tools means fewer surfaces to protect and more airflow between them.
A Quarterly Inspection Checklist
Check the box every few months. Look for:
- Rust spots on steel tools, especially at contact points where two tools rest together
- Cracked plastic bins
- Loose dividers
- Tools that drifted out of place
- Silica packets that have gone soft or changed color
Weight Distribution for Portable Boxes
Weight distribution matters if you carry the box. Load heavy tools at the bottom and center, a top-heavy box tips and dumps everything, while a balanced one carries flat.
A simple carry test: close the box, lift it by the handle with one hand, and hold it at arm's length for ten seconds.
For a small hand box, keep the center of mass within about 2 inches of the handle's vertical line.
Ergonomic Carry and Reach
Ergonomics in a toolbox means less reaching and less twisting. Heavy tools go low and close to your body. Light tools go high. If you carry the box often, this layout also improves weight distribution.
- Heavy items: hammers, drills, large wrenches at the bottom and near the handle
- Medium items: pliers, screwdrivers at mid-level
- Light items: bits, tape, small parts up top and at the far end
The goal is that your most-used tool is the shortest reach and your heaviest tool is the shortest lift. Those two rules rarely conflict, but when they do, favor the heavy tool, a strained lift is the injury risk, not a long reach.
Conclusion
Knowing how to organize a small toolbox efficiently comes down to one thing: too much stuff and no system. Empty it, sort by category or trade, cut duplicates, and arrange by how often you reach for each tool.
If you need organizers, cords, or a specific tool you can't find locally, Tools, Handbags, and More can help.
Get started with Tools, Handbags, and More and build a toolbox you can actually find things in.
Frequently Asked Questions
What is the best organizer for a small toolbox?
The best organizer depends on your tools and drawer depth. Foam inserts and drawer liners work well for keeping sockets and wrenches from shifting. Magnetic strips are ideal for frequently used hand tools. For extension cords and bulky items, a portable holder like the Yellow Jacket Extension Cord Holder keeps things tidy and accessible. Modular storage systems let you reconfigure compartments as your tool inventory changes.
How do you keep tools from sliding around in a small toolbox?
Line drawers with non-slip drawer liners or foam inserts cut to fit your tools. Magnetic strips hold metal tools in place and keep them visible. Compartmentalization with small dividers stops sockets and bits from rolling. For portable boxes, pack heavier tools at the bottom and use a roll cab or vertical storage to reduce movement during transport.
Is it better to store tools by type or by frequency of use?
Both approaches work, but frequency of use should drive your primary layout. Put quick-access tools like screwdrivers, pliers, and a tape measure in the most reachable spots. Group less-used specialty tools by type in secondary compartments. This ergonomic layout reduces the time you spend digging and keeps your workflow smooth on job-site tasks.
How can I maximize vertical space in a small toolbox?
Use vertical storage solutions like pegboards, magnetic strips on the lid, or stackable modular bins. Shadow boarding on the inside of a cabinet door or lid keeps tools visible and accessible. For deeper drawers, add tiered inserts so you can stack sockets and wrenches without losing sight of them. These DIY toolbox organization hacks cost little and free up significant space.