

How to Select a Tactical Bag for Urban Survival
Table of Contents
- Start With Urban Threat Modeling, Not Gear Lists
- Key Features to Look For in a Tactical Bag
- Why a Low Profile Tactical Backpack Beats a Military-Style One
- Sizing, Capacity, and Load Distribution
- Urban Bug Out Bag Essentials That Change Your Bag Choice
- How to Pack a Get Home Bag for Public Transit and Tech Carry
- Common Mistakes When Choosing a Tactical Bag for Urban Survival
- Frequently Asked Questions
Last Updated: September 25, 2026
Start With Urban Threat Modeling, Not Gear Lists
Most people shopping for a tactical bag start with the bag. That's backwards. Urban threat modeling means identifying the risks you actually face before buying gear, a commuter faces different problems than a suburban parent or a delivery driver. The bag has to match the threat.
Here's what to map before you shop:
- Transit risk: Do you rely on trains, buses, or rideshares? Then you need a low profile tactical backpack, not a military-style one.
- Distance risk: How far is your walk home if transit shuts down? This sets your carry weight.
- Time risk: Are you usually minutes from home, or hours?
- Tech risk: Do you carry a laptop daily? That changes your compartment needs.
Key Features to Look For in a Tactical Bag
The features that matter most in an urban tactical bag are durability, comfort, and organization. Skip the marketing language and check these three areas.
Material Durability and Fabric Types
Fabric durability comes down to nylon denier, the thickness rating of the material. Higher denier means a tougher weave.
- 500D to 600D nylon: Light, water-resistant, and fine for daily carry
- 1000D nylon: Heavier and more abrasion-resistant, but also stiffer
- Ripstop fabric: Woven with reinforcement threads that stop small tears from spreading
- 1680 denier polyester: Very heavy-duty, often used in tool bags and hard-use gear
Comfort and Ergonomics
Comfort separates a bag you carry daily from one that sits in a closet. Look for a padded back panel, load-bearing shoulder straps, and a sternum strap to keep the bag from swinging. A waist belt shifts weight onto your hips, which changes everything on a long walk, and wide, padded straps distribute weight better than narrow ones that dig in fast.
Why a Low Profile Tactical Backpack Beats a Military-Style One
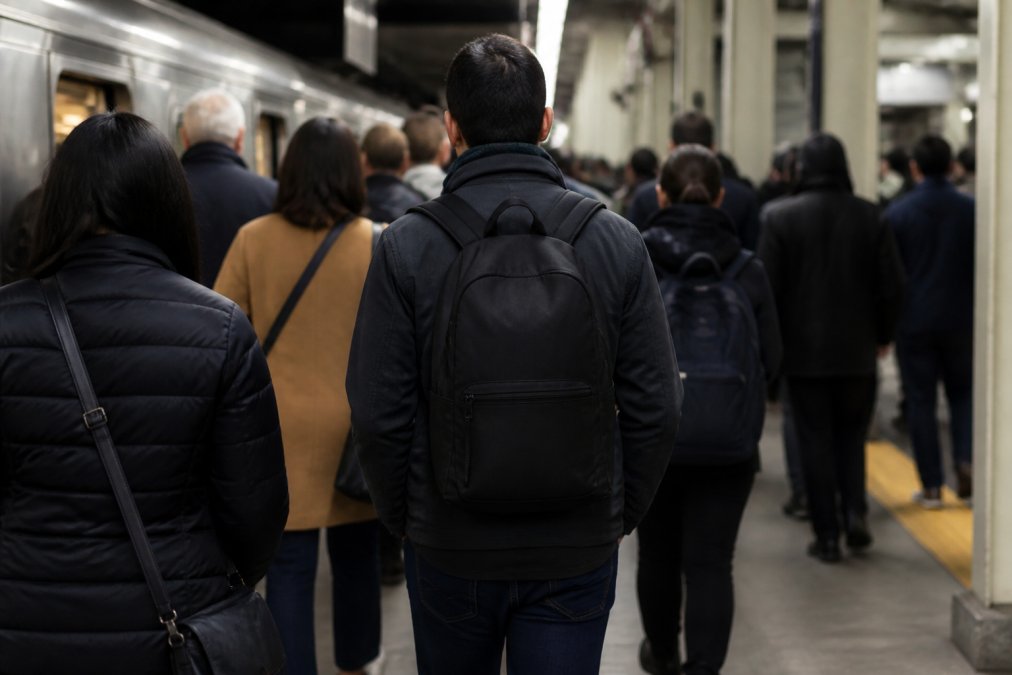
A low profile tactical backpack beats a military-style one in urban settings because it doesn't advertise what you're carrying. Gray man theory holds that blending in is a survival advantage.
Sizing, Capacity, and Load Distribution
Match capacity to your actual carry, not your ambitions. A bag that's too large invites overpacking, which ruins load distribution, and in a city, capacity is also capped by the space you move through.
Start With Torso Length, Not Liter Count
Liter capacity tells you volume; torso length tells you whether the bag will carry well. Measure from the C7 vertebra (the bony bump at the base of your neck) to the top of your hip bones. That number, not your height, determines your pack size:
- Under 17 inches: Small torso, look for bags with adjustable or short torso ranges.
- 17 to 19 inches: Average torso, most 25-35 liter urban packs fit here.
- Over 19 inches: Long torso, you need an extended frame or adjustable yoke, or the load will sag below your hips.
Capacity Bands for Urban Carry
| Carry Scenario | Suggested Capacity | Key Feature Priority |
|---|---|---|
| Daily commute, tech carry | 20-30 liters | Padded laptop sleeve, structured back panel |
| Get home bag | 25-35 liters | Load lifters, waist belt, compression straps |
| Full urban bug out bag | 35-45 liters | Compartmentalization, internal frame, hip belt |
| Multi-day displacement | 45-55 liters | Full suspension, load lifters, frame sheet |
Two constraints most guides skip:
- Transit dimensions. A fully loaded 45-liter pack can exceed the footprint of a subway seat or bus aisle. If you rely on public transit, measure your packed bag against the space you actually occupy, not the airline carry-on limit.
- Doorway and stairwell clearance. In a stairwell evacuation, a wide, overstuffed pack catches railings and doorframes. Compression straps that cinch the bag down to its actual load solve this.
How Load Distribution Actually Works
The mechanism is simple: weight close to your spine and high in the pack reduces the lever arm your shoulders fight. Three components do the work:
- Frame sheet or internal stay. Transfers vertical load from the shoulder straps to the hip belt. Without it, the bag folds and all weight hangs on your shoulders.
- Load lifters. Small straps angling from the top of the shoulder strap to the top of the pack. Tightening them pulls the load closer to your back and up off your shoulders. Most shoppers never touch them.
- Hip belt. A properly fitted hip belt should carry 60-80% of a loaded pack's weight. If your shoulders ache after a mile, it's too loose, too high, or missing.
The Test Walk
Load the bag to your realistic carry weight, not an empty shell, and walk one mile. Adjust in this order: hip belt, shoulder straps, load lifters, sternum strap. That sequence is the difference between a bag that works and one that sits in a closet.
Internal Organization and Compartmentalization
Compartmentalization keeps gear findable under stress, digging through a single main compartment costs you time.
- Quick access pockets for keys, phone, and a light
- A dedicated hydration bladder sleeve
- Separated pouches so wet gear doesn't soak dry clothes
- A padded laptop compartment if you carry tech daily
Hydration System Compatibility
Hydration bladder compatibility means the bag has a sleeve and a tube port for a water reservoir, in a city, that's for hands-free hydration on a long walk home, not hiking. Check that the tube routing keeps the hose out of the way and that the sleeve fits your reservoir. Two details worth verifying:
- Insulated tube sleeve. In cold weather, an uninsulated hose freezes at the bite valve within minutes of exposure. An insulated sleeve or a bite-valve cover solves this.
- Sleeve placement. A center-back sleeve keeps the reservoir flat against your spine, which actually helps load distribution. A side sleeve shifts weight off-center.
Urban Bug Out Bag Essentials That Change Your Bag Choice
Your urban bug out bag essentials determine the bag, not the reverse. The contents decide the size, weight, and organization you need.
How to Pack a Get Home Bag for Public Transit and Tech Carry
Most tactical bag guides assume you're walking a trail. Urban survival means standing on a crowded platform at rush hour with a bag that has to fit under a seat, not block an aisle, and not scream "prepper." That changes what you pack and how you pack it.
The Transit Footprint Problem
A fully loaded 40-liter pack is roughly the size of a small carry-on suitcase. On a packed train car it occupies floor space someone else needs, catches on turnstiles, and forces you to hold it in front of you, exactly the posture that draws attention. Constraints to plan around:
- Under-seat fit. Measure your packed bag's depth. If it won't slide under a standard transit seat, you'll be holding it on your lap for the whole ride.
- Aisle clearance. A bag wider than your shoulders will bump seated passengers as you move down the car. Compression straps that cinch the load down to its actual size fix this.
- Turnstile and fare gate width. Overstuffed side pockets catch on gate arms. Keep side pockets flat or empty when transiting.
Packing Order for a Get Home Bag
- Hydration bladder first. It goes in its sleeve before anything else, flat against your back, which also improves load distribution.
- Heaviest items high and against your spine. Water, tools, and a full battery bank go in the top third of the main compartment, closest to your back.
- Laptop in a dedicated padded compartment. Never loose with tools, the padding is the protection.
- Quick-access items in exterior or top-lid pockets. Phone, keys, light, and any medical item go where you can reach them without taking the bag off.
- Wet or dirty gear in a separate pouch. A dry bag or wet pocket keeps rain-soaked layers from soaking your spare clothes.
- Modular pouches only if you'll actually use them. Every pouch adds weight and a visual signal. If you haven't used it in a month, it comes off.
Tech Carry: What Tactical Bags Get Wrong
Most tactical bags are built for gear, not electronics. A laptop thrown into a main compartment next to a multi-tool is a cracked screen waiting to happen. If you carry tech daily, look for:
- A padded, suspended laptop sleeve. "Suspended" means the sleeve doesn't touch the bottom of the bag, so a drop doesn't transfer directly to the laptop.
- A separate tablet or document sleeve. Keeps a tablet from sliding against the laptop.
- Cable and charger organization. A small zip pouch or elastic loops keep cables from tangling with tools.
- A battery bank pocket. Keeps the battery accessible so you can charge your phone without unpacking.
The MOLLE Trade-Off in an Urban Setting
MOLLE webbing is the attachment system that lets you add pouches, holsters, and gear to a bag. It's genuinely useful, and genuinely visible. In a city, external MOLLE signals "tactical" to anyone who recognizes it and adds snag points that catch on seats, railings, and other people. The trade-off:
- External MOLLE: Maximum modularity, maximum visibility. Fine for rural or range use. A liability on a commuter train.
- Internal MOLLE: Modularity without the external signal. You organize the inside of the bag with the same system, but the outside looks like a normal backpack.
- No MOLLE: Simplest and most discreet, but you lose the ability to reconfigure.
Test the Load Before You Rely On It
Pack the bag to your realistic carry weight, then take it on your actual commute. Ride the train or bus with it. Walk the last mile home. Adjust the hip belt, shoulder straps, and load lifters in that order. A bag that feels fine in the store fails on mile three, and the only way to know is to test it on the route you actually travel.
Common Mistakes When Choosing a Tactical Bag for Urban Survival
The biggest mistake is buying for the fantasy instead of the commute. The traps we see most:
- Overbuying capacity: A 45-liter bag for a 20-minute walk home.
- Chasing the tactical aesthetic: Camo and MOLLE everywhere, which defeats gray man theory.
- Ignoring the waist belt: Then wondering why your shoulders ache.
- Skipping the test walk: A bag that feels fine in the store fails on mile three.
- Forgetting tech protection: A loose laptop next to a multi-tool is a cracked screen waiting to happen.
Frequently Asked Questions
What should be included in an urban survival bag?
An urban bug out bag should cover water, food, first aid, and communication without looking like survival gear. Pack a hydration bladder, high-calorie bars, a compact trauma kit, a battery bank, and a printed map of your metro area. Add a light rain shell and a change of socks. The goal is 72 hours of self-sufficiency that fits a bag you can carry on a train or bus without drawing attention.
How do you choose a tactical bag that doesn't look too tactical?
Pick a low profile tactical backpack in neutral colors like black, gray, or navy, and avoid visible MOLLE webbing on the exterior. Look for internal organization, a padded laptop sleeve, and civilian branding. A bag that reads as a commuter pack gives you the load bearing and durability of tactical construction without signaling that you are carrying emergency supplies.
What size backpack is best for a 72-hour urban survival kit?
Most people need 25 to 35 liters for a 72-hour kit. That range holds three days of water, food, clothing, and a first aid kit while staying comfortable on a commute. If you carry a laptop and work gear daily, stay closer to 30 liters. Anything over 40 liters gets heavy fast and looks out of place in an urban environment.
How do I pack a get home bag without overloading it?
Start with the heaviest items close to your back and centered, then build outward. Keep quick access items like a flashlight and trauma kit in the top or front pocket. Use compression straps to stop shifting, and weigh the finished bag. Aim for under 20 pounds. A sternum strap and waist belt transfer weight to your hips, which matters if you are walking several miles.
Picking the right bag is a decision most people rush, then regret on the first real walk. Tools, Handbags, and More can help you find gear that fits your actual threats and daily carry, from durable tool bags to hard-to-find items through our custom sourcing service. Browse our wide range of product categories or let our team track down the exact bag you need. Get started with Tools, Handbags, and More and carry gear that actually works for your city.