

Drones for Photography for Beginners 2026
Table of Contents
- What Makes a Drone Right for Photography Beginners
- Best Overall Beginner Drones for Aerial Photography
- Drones vs Cameras for Aerial Photography: Which Fits Your Goals
- FAA Drone Registration Requirements and Legal Considerations
- Drone Photography Tips for Beginners: Composition and Technique
- Essential Drone Accessories for Beginners
- Weather, No-Fly Zones, and Safety Limits You Need to Know
- Getting Started: Your First Drone Purchase Checklist
Last Updated: August 30, 2026
What Makes a Drone Right for Photography Beginners
Choosing the right drone for photography requires understanding what separates a frustrating purchase from a tool that expands your creative possibilities. The difference between a model that delivers sharp images and one that produces mediocre results often comes down to sensor size, gimbal stabilization, and flight stability.
A drone for photography for beginners 2026 needs three core capabilities: reliable gimbal stabilization to eliminate shake, a sensor large enough to capture detail in varied light, and intuitive controls that let you focus on composition instead of fighting the interface.
Flight time matters more than you'd think. A 20-minute battery gives you roughly 12-15 minutes of actual shooting time after accounting for takeoff and landing. Budget-conscious beginners often overlook this, then discover they need multiple batteries to shoot anything meaningful.
The FAA requires registration for any drone weighing more than 0.55 pounds, which covers virtually every serious photography drone (faa.gov). It takes minutes online and costs a few dollars, but it's legally mandatory before your first flight.
Best Overall Beginner Drones for Aerial Photography
The best drones for photography for beginners 2026 balance image quality, ease of use, and realistic pricing.
Key Specs: Flight Time, Camera Sensor, and Gimbal Stabilization
Flight time directly determines how many shots you'll capture in a session. A 25-minute rated flight time translates to roughly 18-20 minutes of actual flight before you need to land and swap batteries. A three-axis gimbal (pitch, roll, yaw) is the minimum standard for any drone claiming to be photography-focused.
Sensor size determines how much light your camera captures and how much detail survives in shadows. A 1-inch sensor (roughly 13mm × 8.6mm) is a meaningful step up from smaller sensors found in budget models, capturing noticeably more dynamic range.
Most beginner drones default to automatic exposure, which works reasonably well in bright daylight but struggles in overcast conditions or golden hour. Manual mode gives you control once you understand the exposure triangle: shutter speed, aperture, and ISO.
Obstacle avoidance sensors are more valuable than transmission range for safety and peace of mind.
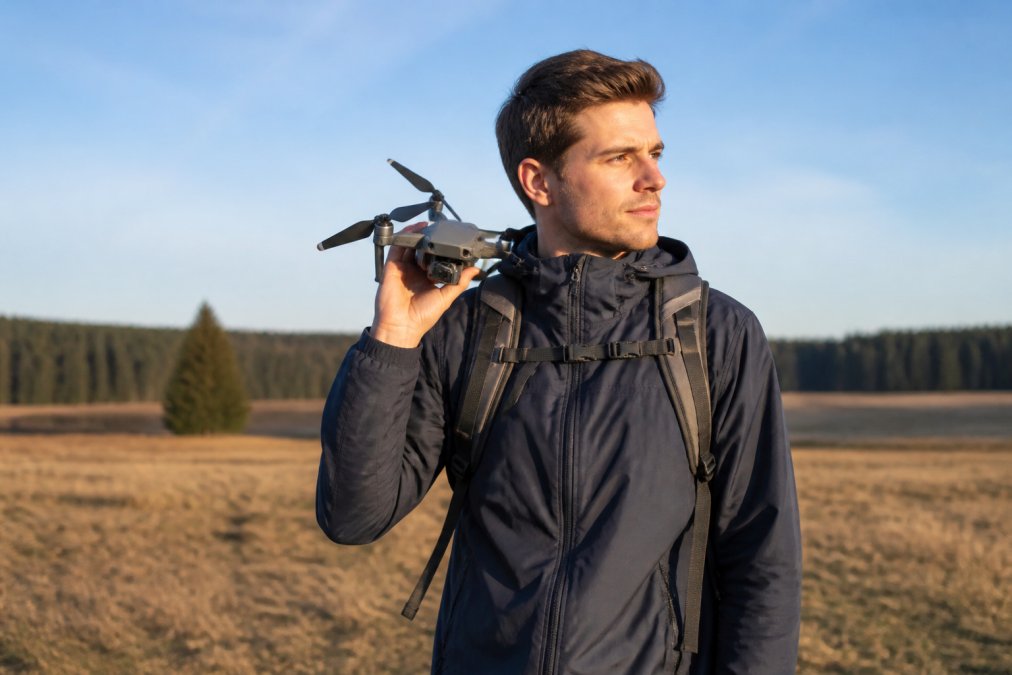
Budget-Friendly Options for Starting Out
Entry-level drones under $500 make compromises. Smaller sensors produce grainier images, especially in lower light. Shorter flight times mean more frequent battery swaps.
The sweet spot for beginners is $400-$700. Models in this range offer genuine 1-inch sensors, 20-30 minute flight times, and gimbal stabilization that produces broadcast-quality video.
Used drones can stretch your budget further, but inspect carefully. Battery health degrades over time, and a used drone with degraded batteries costs more to operate than a new one with fresh cells.
Tools, Handbags, and More specializes in sourcing specific drone models, including discontinued or hard-to-find beginner options. If you identify a particular model that suits your needs, our custom sourcing service can track it down, even if it's not currently in stock.
Drones vs Cameras for Aerial Photography: Which Fits Your Goals
A dedicated camera (DSLR or mirrorless) paired with a traditional tripod gives you ultimate control over composition, lens choice, and image processing. The tradeoff: you're shooting from ground level. Aerial perspective requires a drone or manned aircraft.
A drone captures perspective no ground-based camera can reach. The limitation is the fixed lens and smaller sensor. You can't zoom optically, and you can't swap lenses mid-shoot.
For beginners, the answer is usually: start with a drone. It's cheaper than a quality camera system, teaches you composition and exposure fundamentals, and delivers usable results immediately. Drones excel at landscape and architectural photography. They struggle with fast-moving subjects and situations requiring extreme zoom.
FAA Drone Registration Requirements and Legal Considerations
The FAA requires registration for any drone weighing more than 0.55 pounds. Registration costs $5 and lasts three years. You apply online at the FAA's drone registration portal, receive a registration number, and must write it on your drone.
Before every flight, check the B4UFLY app, which shows no-fly zones and altitude restrictions for your location.
Altitude limits cap out at 400 feet above ground level. Line-of-sight is mandatory. Your drone must remain visible to you or a spotter throughout flight.
Liability insurance isn't legally required, but it's worth considering. Insurance typically costs $100-$300 annually and covers accidental damage claims.
Drone Photography Tips for Beginners: Composition and Technique
Aerial photography follows the same composition rules as ground-based work: rule of thirds, leading lines, depth, and balance matter just as much from the air. Start with simple compositions. A single strong subject works better than trying to capture everything.
Use leading lines to guide the viewer's eye. A river, road, or shoreline creates natural flow through the image. Diagonal lines are stronger than horizontal ones.
Altitude changes the story. Low altitude (50-100 feet) emphasizes foreground and creates drama. Medium altitude (200-300 feet) balances foreground and background. High altitude (400 feet) shows landscape patterns and context.
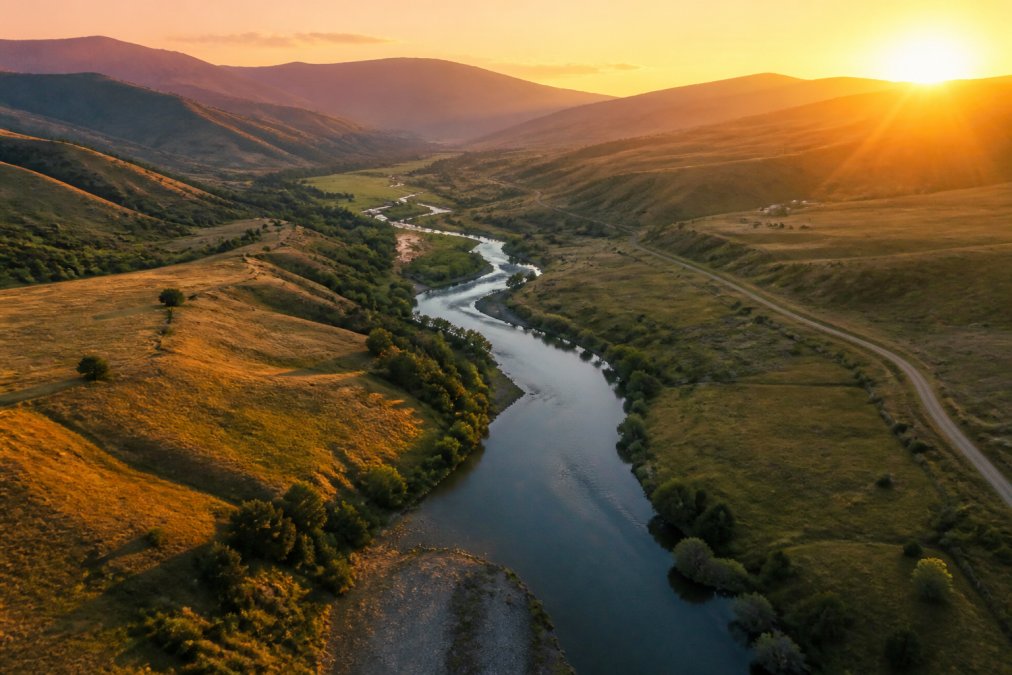
Mastering Flight Stability, Shutter Speed, and Dynamic Range
A three-axis gimbal corrects for pitch (up/down tilt), roll (side-to-side tilt), and yaw (rotation). Smooth, intentional movements create better footage than jerky inputs.
Shutter speed controls motion blur. In bright daylight, use 1/400th of a second or faster to freeze motion. In overcast conditions, drop to 1/200th. Most beginners leave shutter speed on automatic, which is fine for learning.
Dynamic range is the difference between the brightest and darkest parts of your image. RAW capture preserves more information in shadows and highlights than JPEG. If your drone supports RAW, use it.
RAW Capture and Post-Production Workflow
RAW files are unprocessed sensor data requiring post-processing. A basic workflow: import RAW files into editing software (Lightroom, Capture One, or similar), adjust exposure and white balance, recover shadow and highlight detail, add contrast and saturation, and export as JPEG or TIFF for sharing.
Exposure adjustment is the first step. Most RAW files need 0.5-1.5 stops of adjustment. White balance corrects color temperature. Drones often default to cool (bluish) white balance in overcast light.
Shadow and highlight recovery are where RAW shines. Lift the shadows slider to reveal detail in dark areas. Lower the highlights slider to recover blown-out sky detail. JPEG files can't recover this information, RAW can.
Contrast and saturation are creative choices. Drone footage tends toward flat colors due to the small sensor and high altitude. Adding 10-15 points of contrast and 5-10 points of saturation brings the image to life without looking artificial.
Essential Drone Accessories for Beginners
Extra batteries are the first purchase after your drone. A second battery doubles your shooting time and costs $50-$150 depending on the model.
A carrying case protects your drone during transport. Foam-lined cases keep everything organized and prevent damage.
Propeller guards reduce risk during learning flights. They add weight and slightly reduce flight efficiency, but they're worth it while you're building confidence.
Neutral density filters reduce light entering the sensor, allowing slower shutter speeds in bright conditions. They're optional for beginners but valuable once you start shooting video.
Tools, Handbags, and More carries a range of drone accessories. Our custom sourcing service can track down replacement gimbals, spare propellers, or specialized filters.
Weather, No-Fly Zones, and Safety Limits You Need to Know
Wind is your biggest enemy. Most drones fly safely in winds up to 20 mph, but they struggle above that. Check wind speed before flying; if gusts exceed 15 mph, postpone.
Rain and moisture damage electronics. Drones aren't waterproof. Avoid flying in rain or immediately after.
Temperature affects battery performance. Cold batteries discharge faster and hold less charge. In winter, keep batteries warm before flying.
No-fly zones aren't suggestions, they're legally enforced. Violating airspace restrictions carries fines up to $27,500.
Altitude limits cap at 400 feet above ground level. Flying higher puts you in controlled airspace used by manned aircraft.
Return-to-home automatically flies your drone back to its launch point if the signal is lost or battery is low. It's not infallible. Always maintain line-of-sight and be ready to take manual control.
Getting Started: Your First Drone Purchase Checklist
Before buying, define what you'll actually shoot. Landscapes? Architecture? Video? Different goals favor different drones.
Research battery life claims versus real-world performance. Manufacturers test under ideal conditions. Expect 70-80% of advertised flight time.
Check the learning curve. Some drones require calibration and firmware updates before first flight. Others are ready to fly out of the box.
Read reviews from actual users, not marketing copy. Look for comments about gimbal stability, image quality, and how the drone handles wind.
Budget for batteries and accessories. The drone itself is the foundation, but you'll spend 20-30% more on batteries, cases, and filters to actually use it effectively.
Consider your physical ability. Some drones are heavier and require more hand strength to hold steady.
| Factor | Beginner Priority | Why It Matters |
|---|---|---|
| Flight Time | 20+ minutes | Longer sessions mean more shots per battery swap |
| Sensor Size | 1-inch minimum | Larger sensors capture more detail and dynamic range |
| Gimbal Stabilization | 3-axis | Eliminates vibration and shake in video and stills |
| Weight | Under 2 pounds | Easier to carry and reduces fatigue during shoots |
| Learning Curve | Intuitive controls | Simple interface lets you focus on composition |
| Price | $400-$700 range | Sweet spot for quality without overwhelming features |
Start with a single drone and fly it for a full season before upgrading. You'll learn its strengths and limitations, which informs smarter future purchases.
Finding the right drone for photography for beginners 2026 means balancing capability with usability. You need a tool that delivers quality images without requiring a pilot's license to operate. Tools, Handbags, and More helps you source the exact drone that fits your vision, whether it's in stock or requires our custom sourcing service to locate. Start with the fundamentals, flight stability, sensor quality, and intuitive controls, and you'll build a foundation for years of aerial photography.
Frequently Asked Questions
What is the best drone for a beginner photographer?
The best beginner drone balances ease of use, camera quality, and portability. Look for models with gimbal stabilization, at least 12-megapixel sensors, 20+ minutes of flight time, obstacle avoidance, and return-to-home functionality. Compact designs are ideal for travel, while autonomous flight modes reduce the learning curve. Your choice depends on whether you prioritize image resolution, portability, or budget.
Do I need an FAA license to fly a drone for photography?
If you're flying recreationally, you don't need a Part 107 commercial license. However, you must register your drone with the FAA if it weighs more than 0.55 pounds. For commercial aerial photography work, you'll need Part 107 certification. Check the FAA's UAS registration portal for current requirements.
What features should a beginner look for in a camera drone?
Prioritize gimbal stabilization to reduce camera shake, a sensor size of at least 1-inch for better dynamic range, and RAW capture capability for post-production flexibility. Flight stability features like GPS positioning and visual tracking make flying easier. Look for 25+ minute flight time, obstacle avoidance, and a user-friendly remote controller. Portability matters if you travel frequently.
Is it worth buying a drone for photography?
Yes, if you want unique aerial perspectives that traditional cameras can't achieve. Drones offer access to compositions impossible from ground level and are more affordable than hiring aerial photographers. However, they require learning curve time, FAA compliance, and practice with post-production. Consider your photography goals: if you want creative aerial shots or landscape work, a drone adds significant value to your toolkit.
What are the most important drone photography tips for beginners?
Master composition first by planning shots before flying. Use shutter speed to control motion blur in video, adjust ISO sensitivity carefully to balance detail and noise, and shoot in RAW format when possible for post-production flexibility. Practice in calm weather, maintain altitude limits, and use return-to-home as a safety feature. Study how gimbal stabilization affects your footage and invest time in post-production workflow to maximize image quality.
What essential accessories should a beginner drone owner buy?
Start with extra intelligent flight batteries (most drones give 20-30 minutes per battery), propeller guards for safety, and a carrying case for portability. A ND filter set improves video quality by controlling exposure. Consider a landing pad to protect your drone from grass and dirt. As you progress, add a remote controller extender, spare propellers, and editing software for post-production. These accessories extend flight time and improve your results.
This article was written using GrandRanker